Where is it? How do I find it?
Spatial awareness is a key part of children’s development and one of the most important foundations for later school skills such as reading, writing, and maths. That’s why it’s essential to support this skill intentionally from an early age.
In this article, you’ll find a short theoretical overview followed by simple, playful activity ideas you can try at home with preschoolers and early school-aged children.
Why Is Spatial Awareness So Important?
Think about learning to read.
Even when children start recognising letters, spatial orientation already plays a role. Letters like b and d look almost identical — only the direction of the “belly” changes. The same applies to d and p, where one faces left and up, while the other faces right and down.
It’s very common for children to mix these letters up when learning to read, especially if their spatial and visual orientation skills are not fully developed yet.
The same is true for writing. Children need to know which direction to round or extend a letter, and reading and writing both rely on a clear understanding of direction — for example, that we read and write from left to right.
In maths, difficulties with spatial awareness can show up as problems with:
- following the correct order of operations
- understanding sequences
- keeping track of steps in a task
That’s why developing spatial awareness early can make a real difference later on.
A Quick Look at the Building Blocks of Spatial Awareness
1. Knowing Our Body Parts
Children first learn orientation through their own bodies — understanding where body parts are and how they relate to each other.
2. Understanding Directions and Positions
This includes:
- up / down
- left / right
- forward / backward
- next to, above, below, in front of, behind
3. Two-Dimensional (Flat Surface) Orientation
This becomes especially important later at school, when children need to navigate:
- worksheets
- exercise books
- textbooks
Let’s Play! – Activities to Support Spatial Awareness
1. Exploring Body Parts
These activities help children learn the names and positions of body parts — a fundamental step in spatial orientation.
Discovering Your Own Body
Give simple instructions, for example:
- Show me your hand.
- Touch your ear with your hand.
- Touch your head.
- Lift your leg.
- Hold your elbow.
- Show me your eyes.
You can make it more challenging:
- Touch your left knee with your right hand.
- Touch your right hand with your left foot.
- Point to your forehead with your left hand.
Drawing Body Parts
Ask your child to:
- draw body parts on a simple figure
- name the body parts while pointing to them
👉 You can download this free printable body outline from our Patreon page, which makes this activity even easier to set up.
Talking About Functions
Discuss what each body part is used for:
- What do you do with your hands? (drawing, playing, holding a spoon…)
- What do you do with your feet? (walking, running, cycling…)
- What do you do with your eyes? (seeing people, looking at books…)
2. Spatial Awareness Through Directions
You can practise:
- up / down
- forward / backward
- above / below
- left / right
(Left and right are more advanced and may take time — that’s completely normal. Even younger preschoolers benefit from gentle exposure.)
Obstacle Course
Create a simple obstacle course at home or outside. It doesn’t need much equipment.
Give instructions such as:
- Walk next to the sofa.
- Climb onto the chair.
- Jump off the chair.
- Crawl under the table.
- Walk forward to the armchair.
- Walk back to the sofa.
If this goes well, you can add small practice challenges.
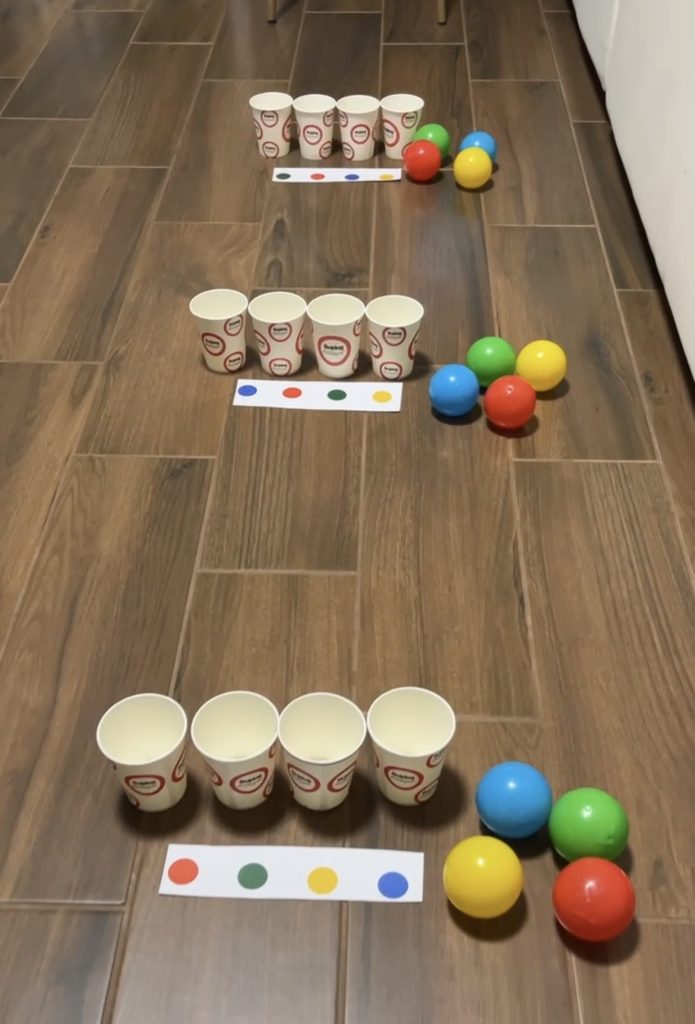
In our 12-Week Coding Logic Program, for example, we practise sequencing by asking children to complete a colour pattern as part of an obstacle course before moving on.
Up, Down, Middle
Give verbal commands:
- “Up!” → raise hands
- “Down!” → lower hands
- “Middle!” → hands halfway up
Make it more fun by playing with others or turning it into an elimination game.
You can also vary movements:
- Up = jump
- Down = squat
Sorting and Placing Objects
Place a chair in the middle of the room and give instructions:
- Put a ball next to the chair.
- Put a toy car behind the ball.
- Put a stuffed animal next to the car.
- Put a blanket behind the stuffed animal.
- Put a spoon under the blanket.
You can easily combine this with counting:
- Put two balls next to the chair.
- Put three toy cars behind the balls.
- Put three balls in front of the chair.
At the end, ask questions like:
- Are there more balls next to the chair or in front of it?
You can also introduce left and right:
- Put a ball on the right side of the chair.
Hidden Treasure
Hide small rewards around the house, garden, or playground.
When your child finds one, ask:
- Where did you find it? (under the bed, behind the tree, on top of the cupboard…)
This also works wonderfully during activities like Easter egg hunts.
Follow the Instructions
Choose a starting point and guide your child step by step:
- Take two steps forward.
- Turn right.
- Take three steps forward.
- Turn left.
- Take one step forward.
- Squat down.
This activity combines directions and counting.
3. Spatial Awareness on a Flat Surface
For these activities, all you need is an A4 sheet of paper and a pencil.
Drawing With Instructions
Give instructions such as:
- Draw a tree in the middle of the page.
- Draw a flower to the right of the tree.
- Draw a bird above the flower.
- Draw a car to the left of the tree.
- Draw a girl under the car.
This also develops fine motor skills.
Colouring With Instructions
Use a prepared picture (or one your child has drawn).
We’ve created a printable colouring sheet specifically for this purpose, which you can download for free from our Patreon page.

Example instructions:
- Colour the pot plant on the right red.
- Colour the middle one red.
- Colour the bee flying under the tree yellow.
- Colour the insect standing between the tree and the tulips green.
- Colour the lower-flying bird black.
- Colour the little heart on the envelope red.
- Colour the object that is between the clouds yellow.
- Colour the tulip on the right purple.
- Colour the tulip on the left orange.
- Colour the apple hanging the highest red.
- Colour the butterfly flying above the tulips blue.
Want More Activities Like This?
If you’d like access to:
- free printable worksheets
- step-by-step activity ideas
- and dozens of additional downloadable resources
👉 Join us on Patreon, where you’ll find the printable materials mentioned in this post completely free, along with many more resources for playful learning at home.